By Tim Pillsworth

Many fire departments struggle with reduced staffing and budgets that cannot keep up with inflation—especially on the volunteer side—and the luxury of having job-specific apparatus is quickly becoming a thing of the past.
Many departments that once had the engine, truck, rescue, and tanker/tender are now purchasing the quint, rescue-pumper/squad, and pumper-tanker/tender. Although this approach might not work for all departments and applications, the correctly designed mixed-use apparatus can work. The most popular thing to do is combine an engine and rescue; in the Northeast, we call it “the squad.” To make a squad work as an engine and a rescue takes some effort.
The first priority of designing a new squad is to ask what its primary function will be. For our region, this is to deploy handlines or master streams that accomplish the target flow rate, to control and extinguish fire, and to carry the required rescue equipment to alarms in its response area. What does your department need your squad to do? That is a very local question. Although it can be set up correctly to complete other tasks, we cannot expect one piece of apparatus to do everything.
Also important to remember is that reducing the number of apparatus in a department lowers insurance, maintenance, and fuel costs and frees up space in fire stations. However, if a multipurpose rig is out of service, there might not be a spare to fill in for it.
CREATING YOUR SQUAD
To truly get started, don’t just copy what your neighbors have, do, or will purchase. We do not know if they, in fact, did the research, have the same needs as your department, or have any idea what they are doing in the first place. Do a little thinking, looking, measuring, and research. First, investigate the types of incidents to which your department regularly responds. We typically respond first due with the squad to vehicle fires, motor vehicle accidents (MVAs), brush, and structure fires. Most feel that the “one” house or “single” location in your first due should not dictate the entire apparatus design and layout; look at the big picture.
Let’s look at the engine side of the squad as well as its fire suppression equipment.
Trash/jump line. The trash line/jump line has replaced the booster reel (red line) that many engines had not so long ago. Many departments removed the booster line from the top of the engines to reduce climbing or from the rear compartment to increase valuable compartment space. The trash line, with its greater flow capabilities and location low to the ground for ease and safety, has made it very popular. Departments that still have or incorporate booster lines should not stretch them for a working vehicle or structure fire because of low flow rates [60 to 75 gallons per minute (gpm)].
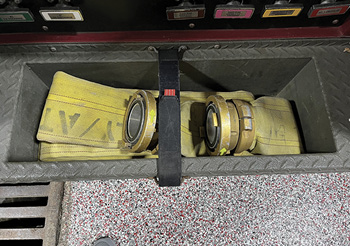
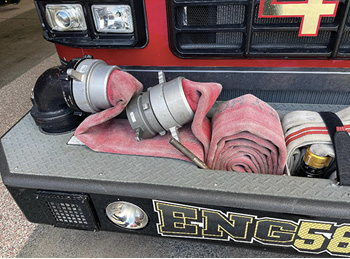
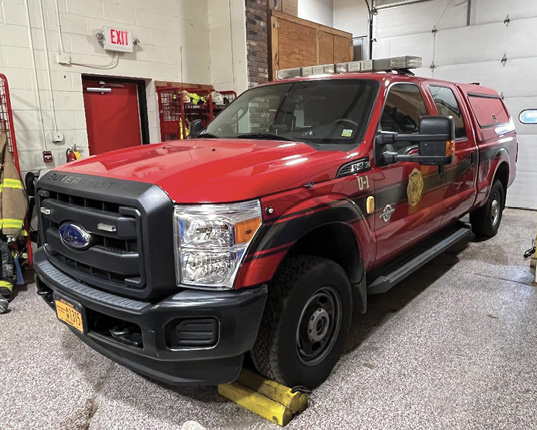
The trash/jump line is very useful for vehicle, brush (close to the road), trash, and general nuisance fires, and MVA support. The trash line can be located on the front bumper (photo 1) or sidestep (photo 2), or as a small bundle load on a rear step or even the bottom of a compartment. The line should be quick and easy to stretch and repack for a simple return to service. Typically, there are 1¾-inch lines of 100 to 150 feet long. There are many different methods to pack the hose; with each method, there is a positive and negative aspect. One thing to ask yourself regarding the hose load you choose should be: can it be easily shortened? This is also where we can speak a little about nozzle selection. For a trash line, a combination nozzle (fog) is the most practical because of its ability to have a larger cone of water, foam capabilities, and for use while operating in a noncontained space such at a mulch, dumpster, or vehicle fire.

1

2
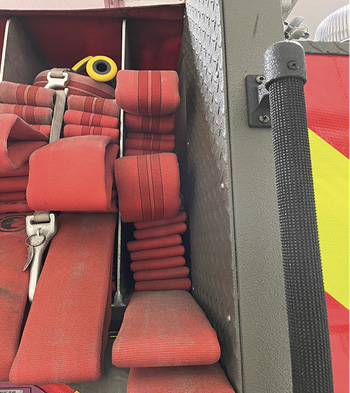
Crosslays. Most departments find that a 200-foot preconnected line works the best as a standard attack line from a crosslay—it’s long enough to reach the front door with 50 to 100 feet of line for the attack but short enough to make it quick to deploy and place into service. To make the line function better and easier to repack, disconnect/extend, or relocate, one trick is to add a “pony length” (photo 3) as the starter length; this would be between five and 15 feet of line that the pump operator can easily disconnect from the ground to allow the line to be lengthened, removed for repacking, or disconnected for relocation.
3
For longer stretches or reverse lays, there are a few methods that work well. Although they might have different names or packing methods, they can become the “go-to” line in many departments. The “long stretch” or “apartment load” (photo 4) is set off the rear hosebed. For the apartment load, the line’s working diameter will remain 1¾ inches to allow for flexibility and control (100 to 150 feet), while the remainder of the line or supply side is of a larger diameter (2½ inch) to reduce friction loss in the longer stretches. There are many pros for this hose load: its ability to be used as a reverse lay, for a long stretch, to reduce friction losses on long stretches, or to be changed to a 2½-inch line. Break the line at the reducer and attach a 2½-inch nozzle, and you have created a second heavy line.
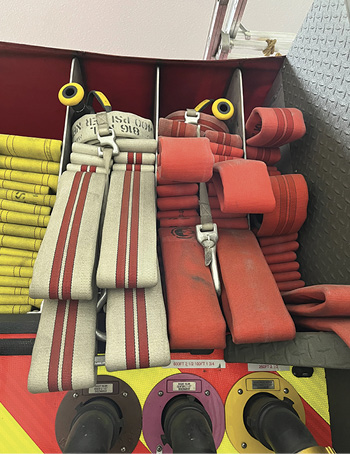
4
Since it is a static load (not preconnected), adjust the pump discharge pressure (PDP) according to the number of lengths out (correct count) and the smaller attack line at the end. A pump chart (photo 5) showing proper PDPs and “arm pulls” at known distances to assist in the overall length count is very helpful.

5
Heavy line. For the advanced, taxpayer, or unknown fire, the 2½-inch line (heavy line) must be ready to be stretched. So, place the 2½-inch as a crosslay in a flat or “minuteman” load and off the rear as a static load. As with all crosslay configurations, there are limitations in length—as with the 200-foot 1¾-inch lines—because of the size of the storage area.
Pulling flat or minuteman loads from the rear of the engine can allow for 200 to 400 feet of 2½-inch line for deployment. Many departments use this load preconnected, with additional dead load beneath it. This will allow, for example, the 250-foot preconnected line to be broken quickly and an additional length added from the static bed for the initial stretch. This is a very flexible line for setback, exposure lines, and reverse lays like the 2½-inch load shown in photo 6.
6
Master streams. For the advanced fire, where “big” water is needed quickly, there are two options: the deck gun (photo 7) and the portable monitor. Both can flow between 500 and 1,000 gpm, which can overwhelm and knock down many fires quickly but, at the same time, empty your booster tank quickly.
7
The deck gun is often considered as being only for an exterior/defensive situation. However, it can be an offensive tool when used correctly. Sometimes, when a knockdown is needed, a larger deck gun or portable monitor can be used first in a blitz attack.
Consider a two-story, single-family home with heavy fire venting from the first-floor windows and autoexposing up the vinyl siding into the second story and vinyl soffits. You arrive with a light crew with the next-due some distance away; this is the situation many volunteer, combination, and paid fire departments work with each day. You now have a choice: hit it hard with the deck gun for 30 seconds to knock down the bulk of the fire while the attack line is being stretched or stretch a line and hope that the fire is not too far advanced. Prior to entering the building, the operator can knock down the exterior fire that continues to autoexpose up the outside and into the structure as the handline is being stretched. A gate valve will allow flow control for the amount of water required. Many departments will have the deck gun set to flow between 500 and 1,000 gpm, and a 500- to 1,000-gallon tank will give 30 to 60 seconds of heavy attack. The knockdown will allow stretching the handline and connection to a water supply.
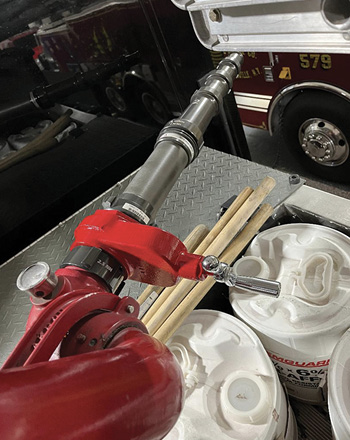
One trick to save tank water when using the deck gun is to place a gate valve in line with the stacked tip. The pump operator charges the deck gun from the panel (some testing will determine the correct PDP) without flowing water until it is aimed correctly, saving valuable water. The operator can then climb the engine, aim the gun, and unload on the fire for as long as required. Once the fire is knocked down, the smaller attack line can go into service.
Another trick is to use a portable monitor. Over the past few years, these have become valuable tools on engines. Being small, light, and able to flow large quantities of water, the portable monitor has its place as both an offensive and defensive water delivery appliance. The optimum setup for the portable monitor mounted on the engine is when it is connected to a static supply line. To allow for the greatest flow, a three-inch line works best, but a 2½-inch can also be used. With the portable monitor connected to a static bed, the stretch is smooth and efficient to the required distance. Once set in the best location for attack, the line can be broken by the operator, and a high flow can be discharged onto the fire (photo 8).

8
SUPPLY
The needs of the operator are often overlooked for engine operations. The operator’s “Frantic 5” includes the following:
- Driving safely to the scene.
- Finding a hydrant (if you have them).
- Laying in or completing a reverse lay.
- Testing/flowing the hydrant.
- Assisting in the stretch.
- Clearing the bed and possibly flaking the line to the door.
- Connecting the supply line.
- Charging the attack line with tank water.
- Charging the supply line.
- Transferring from tank to supply.
- Deploying ladders/tools and monitoring the radio.
So, for the speed and safety of the crew, make the operators’ lives easier with the best layouts for your situation.
For a forward lay to either a hydrant or supply point by other apparatus, have pony lengths of supply line to allow the bed line to be disconnected and connected to the pump intake. By having 25- and 50-foot lengths, the main supply line can be quickly broken and connected to the engine’s intake in a short amount of time. Without the pony lengths, a tremendous amount of supply line will be pulled and contended with for the duration of the call. The location of the pony lengths is very important for efficient operations, the most popular location being the operator’s compartment next to the pump panel. Many departments design hose troughs within the side steps for 25- or 50-foot supply lines for quick access and to open up compartment space (photo 9).
9
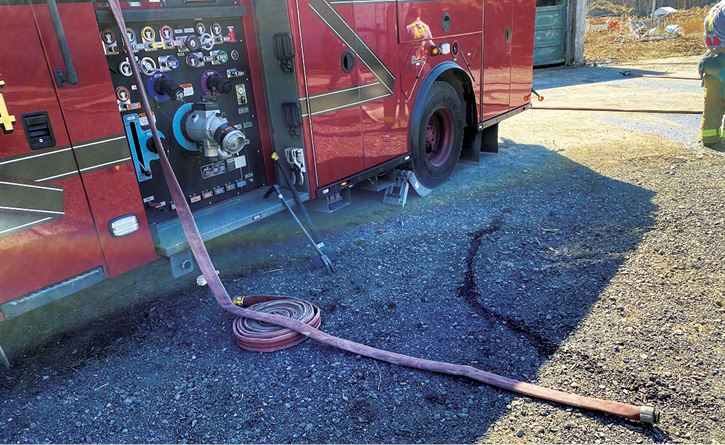
For areas with hydrants, many departments use the front intake valve, which allows for a quick connection because of short distances from the engine; keeping the supply line out of the driving lane, allowing for additional apparatus to pass; and the ability to fully “dress out” the hydrant when maximum flow is required. A preconnected supply line, between 25 and 35 feet, with the steamer connection attached and double-rolled, will allow quick deployment by the operator. The double roll will also allow for a “grab-and-go” stretch.
By placing a hydrant wrench and gate valve with the supply line in the front bumper (photo 10), the hydrant will be fully dressed and placed into service without the need to go to a different location with the engine. As with all supply and discharge setups, flow test your system to ensure you are achieving the required target flow rates.
10
RESCUE OPERATIONS
It’s now time to turn the engine into a squad. So, what does your department need to do? It could be used for emergency medical services (EMS), extrication, hazmat, FAST/RIT, technical rescue, and so on. Added to the increased duties are reduced staffing levels in both the volunteer and career departments, reduced number of apparatus on a fire scene, and requiring more equipment to be carried on less wheeled equipment. With each new duty, there is some amount of equipment required to be mounted and stored on the engine. High-side, full-depth compartments are now the norm on squads manufactured today. Although they make a great toolbox, many do not function as well as their primary role.
EMS. EMS responses continue to grow, so decide if you are providing basic or advanced life support (ALS) care to appropriately designate compartment space. Although this is an important service to our communities, it requires storing equipment that is more fragile than our regular cache. In the cab, compartments have become a useful design; they can be under the rear seat; as a corner cab compartment; or between the driver/officer and rear seating area, which makes them more secure if you provide ALS. If you do provide ALS, climate-controlled compartments might be required to accommodate drug boxes.
Extrication. The question here is, what are your department’s needs? With the shift to electric-hydraulic tools, not only are tool mounts required, but battery-charging stations and backup batteries are as well. The battery charging requires shore power to be supplied to the extrication compartments. Install all extrication equipment (i.e., spreaders, cutters, rams, and so on) in the same compartment to reduce searching for the tools needed. Contain spreaders, cutters, rams, different tips, step chocks, various cribbing, floor jacks, struts, and hand tools to support the operation in a single compartment or next to each other (photos 11-13).

11

12
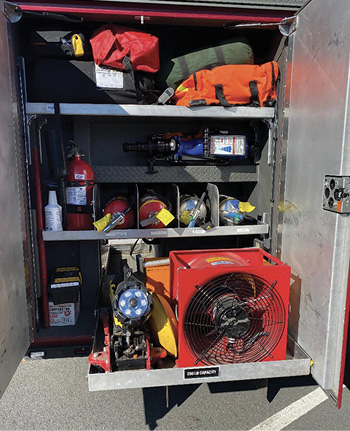
13
Review secondary rescue tools such as air bags, grip hoists, “come-a-longs,” and the like for space requirements vs. frequency of use. If specific tools are typically not used, shift them to a second piece of apparatus or support vehicle.
To round out the extrication needs, store speed dry in five-gallon pails with lids and tools within available space in a compartment or in the well above the pump panel (photo 14). Place backboards and stokes baskets (photo 15) on the rear of the cab or on a drop-down ladder. If on top of the ladder, ensure it can be removed quickly when the ladder is needed on the fireground.
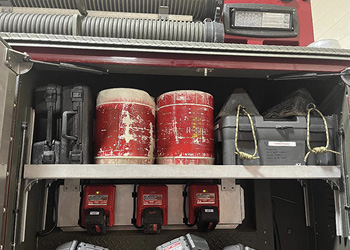
14

15
Although the squad concept is possible, know and accept the tradeoffs prior to making the change. If an engine or a fully new vehicle is desired but cannot be outfitted with the needed equipment, consider using a pickup truck or other support truck to carry the additional equipment if possible—tools that, although needed, are used rarely. Examples of these tools are high-lift bags, additional cribbing, heavy-duty stabilization systems, and larger spill containment equipment, to name just a few. Also, you can use a lower-cost vehicle in conjunction with the engine to carry the additional equipment. Being a small vehicle, the driving requirement could be less than the squad, and a single-firefighter response could be used. This will require you to split crew response on some emergency calls to the complete equipment response package, but you can easily preplan for specific emergencies (photos 16, 17).
16
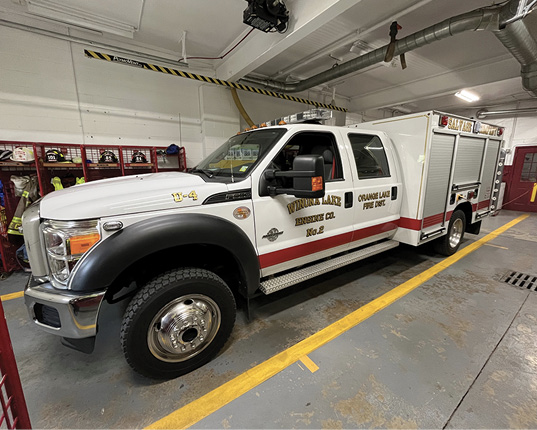
17 Photo courtesy of Brian McGorman.
TIM PILLSWORTH is a 37-year volunteer fire service veteran and a life member and past chief of the Winona Lake (NY) Engine Company where is his currently a firefighter/EMT. He has presented at FDIC International and at other local and regional conferences on engine company operations and leadership in the volunteer fire service. He authored and coauthored many articles on personal protective equipment (PPE), volunteerism, engine company operations, attack system flow testing, and volunteer fire department management and planning. He is the author of the PPE chapter in Fire Engineering’s Handbook for Firefighter I and II. He is a project engineer for the Army Corps of Engineers at the U.S. Military Academy at West Point, New York.
Tim Pillsworth will present “Your PPE: What You Should Know” at FDIC International in Indianapolis, Indiana, on Thursday, April 18, 2024, 10:30 a.m.-12:15 p.m.

